Creating an Incident Report
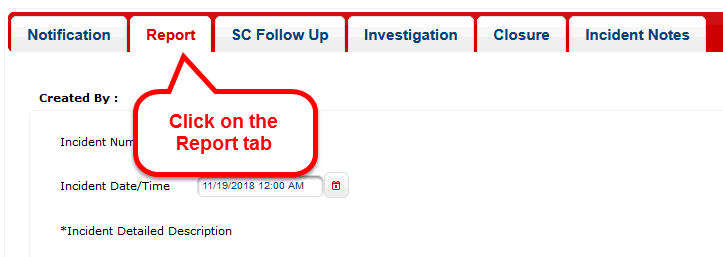
Step 1: Click on the Report tab

Step 2: Update / enhance the Incident description as needed.
Step 3: Enter the Incident's location
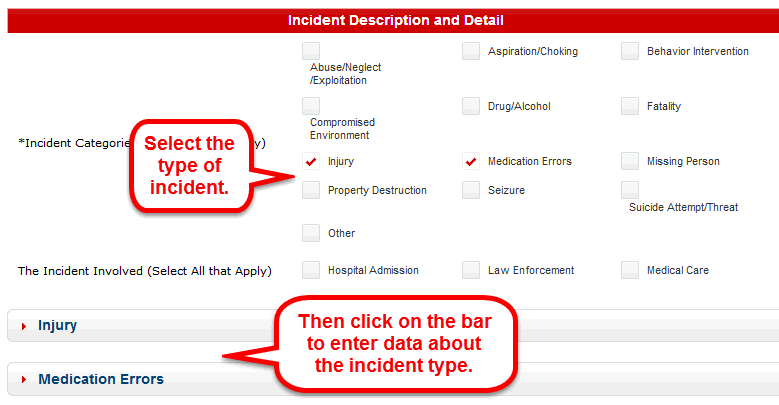
Step 4: Select the type of Incident. Then enter its corresponding data.

Step 5: Enter data about other people who were involved or were notified.

Step 6: Save the report as a "Draft" to keep working on the report (for the full 5 days) or click on "Submit" to finalize and submit the report.

Once the report is submitted, it cannot be changed. So, the submitter should take time to review the report's content thoroughly before they chose to submit.
The report is not considered to be complete until the provider formally clicks on the "Submit" button. If they fail to properly complete and submit the report before the 5 day window has expired, then they are considered to be out of compliance with the terms of their contract.
The "Print Report" button allows the provider to print a report of the incident at any point in the data entry process (so long as the data has been saved before the button is clicked). The report can also be generated after the report has been submitted.
After the provider has submitted the report, their part in the workflow is complete and they have fulfilled their contractual requirements. The next step in the workflow involves the support coordinator where they complete their follow up of the incident and, if required, complete the Department of Health's incident investigation.